
timex radio clock manual
Welcome to the Timex Radio Clock Manual. This guide helps you understand and operate your device effectively, covering setup, features, and troubleshooting for optimal use.
Overview of the Timex Radio Clock
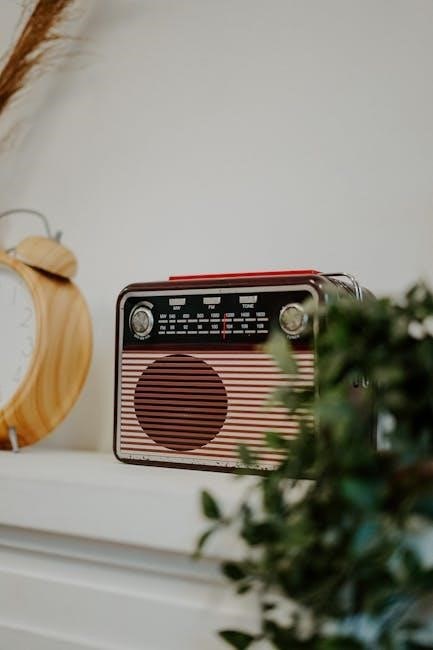
The Timex Radio Clock is a versatile device combining a precise timekeeping system with an AM/FM radio. It features dual alarms, a battery backup system, and an easy-to-read LCD display. Designed for convenience, it offers intuitive controls, a snooze function, and customizable settings. Perfect for home or office use, this clock radio blends functionality with sleek design, ensuring reliable performance and enhancing your daily routine with clear radio reception and accurate time management.
Importance of the Manual
This manual is essential for understanding your Timex Radio Clock’s features and operation. It provides step-by-step guidance for setup, troubleshooting, and utilizing functions like alarms, radio tuning, and battery backup. By following this guide, you can maximize the device’s potential, resolve common issues, and ensure optimal performance. It serves as a comprehensive resource to help you enjoy all the benefits of your clock radio with ease and confidence.
Table of Contents
This manual is organized into clear sections to help you navigate and understand your Timex Radio Clock’s features. Chapters include unboxing, installation, time and date settings, alarm functions, radio features, display settings, power management, troubleshooting, maintenance, warranty information, and a conclusion with final tips. Each section provides detailed guidance to ensure you make the most of your device’s capabilities and enjoy seamless operation.

Unboxing and Accessories
Your Timex Radio Clock comes with essential accessories, including the clock radio, a battery for backup power, an FM antenna, and a detailed user manual.
What’s in the Box
Your Timex Radio Clock package includes the clock radio unit, a backup battery to maintain time and alarms during power outages, an FM antenna for improved radio reception, and a comprehensive user manual. Additional accessories may vary but often include a power cord and warranty information. Ensure all items are accounted for to fully enjoy your device’s features.
Accessories and Their Functions
The Timex Radio Clock comes with essential accessories to enhance functionality. The FM antenna improves radio signal reception, ensuring clear broadcasts. The backup battery maintains time and alarm settings during power outages. A power cord provides reliable electricity connection, while the user manual offers detailed instructions for setup and operation. These accessories ensure optimal performance and ease of use, helping you make the most of your clock radio’s features.

Installation and Setup
Begin by inserting the backup battery to maintain time during power outages. Use the included power cord for reliable electricity connection. Press the SET button to configure time, date, and alarm settings. Explore the buttons for easy navigation and customization of your clock radio’s features.
Inserting Batteries
To ensure your Timex Radio Clock continues functioning during power outages, insert the backup battery. Locate the battery compartment on the device’s underside. Open it and insert the required AA or AAA batteries, matching the polarity indicated. Close the compartment securely. The backup system maintains time and alarm settings. Note the lightning flash warning symbol, indicating dangerous voltage inside. Always handle batteries carefully to avoid damage or electrical hazards.
Initial Setup and Configuration
After inserting batteries, press and hold the SET button to enter setup mode. Use the + and ⎼ buttons to adjust the time, date, and alarm settings. Scroll through options like 12/24-hour format, alarm volume, and snooze duration. Save your preferences by pressing SET again. Ensure the backup battery is installed to maintain settings during power outages. Refer to the display icons for confirmation of saved configurations.
Overview of Buttons and Controls
The Timex Radio Clock features intuitive buttons for easy operation. The SET button accesses the setup menu, while the + and ⎻ buttons adjust values like time, volume, and presets. The ALARM 1/2 buttons enable or disable alarms, and the SOURCE button toggles between radio and alarm modes. Additional controls include the TUNE dial for station selection and the SNOOZE button for temporary alarm delays.

Time and Date Settings
Set the current time and date manually or enable automatic synchronization for accuracy. Choose between 12/24-hour formats and rely on battery backup to retain settings during power outages.
Manual Time and Date Setup
Manually set the time and date by pressing the SET button. Use the forward and backward buttons to adjust the time and date. Confirm with the SAVE button. Ensure the clock is in the correct time zone and format (12/24-hour). The battery backup system retains settings during power outages. This feature ensures accuracy and convenience for seamless operation. Follow the on-screen prompts for precise configuration.
Automatic Time Synchronization
The Timex Radio Clock features automatic time synchronization, ensuring accurate timekeeping without manual adjustments. It uses an FM signal to update the time and date, maintaining precision even during power outages. A clear FM signal is required for proper synchronization. This feature eliminates the need for manual setup, providing reliable and hassle-free timekeeping. It ensures your clock stays updated and accurate at all times, with minimal user intervention required.
12/24-Hour Time Format Options
The Timex Radio Clock allows you to choose between 12-hour and 24-hour time formats, catering to different preferences. To switch formats, press and hold the “SET” button until the display flashes, then use the “+” or “-” buttons to select your preferred format. This feature ensures the clock adapts to your lifestyle, whether you prefer military time or standard AM/PM notation. The display will update accordingly, providing clear and convenient timekeeping tailored to your needs. This flexibility enhances user experience and customization.

Alarm Functions
The Timex Radio Clock offers versatile alarm features, including setting multiple alarms, choosing between radio or buzzer wake-up options, and customizing snooze durations for added convenience and flexibility.
Setting Up Alarms
To set up alarms, press the Alarm button to cycle through Alarm-1 and Alarm-2. Use the tuning knob to set the desired wake-up time. Select the alarm mode by sliding the Alarm-1 Selector Switch to Radio or Buzzer. Ensure the alarm volume is adjusted to your preference. Press Save to confirm settings. The alarm will now activate at the set time, waking you to your chosen sound option. For added convenience, the snooze feature can be enabled during setup.
Turning Off Alarms
To turn off alarms, press the Snooze button, which also functions as the Off button. This will deactivate the alarm temporarily. To permanently disable an alarm, slide the Alarm Selector Switch to the Off position. Note that turning off the alarm does not delete your saved settings. The alarm will remain programmed and can be reactivated later by sliding the switch back to your preferred alarm mode. This ensures uninterrupted use of other features while managing alarms effectively.
Customizing Alarm Volume and Snooze
Adjust the alarm volume by pressing the Volume button until your desired level is reached. The Snooze feature can be activated by pressing the Snooze button during an alarm. To customize snooze duration, refer to the Initial Setup section. This allows you to tailor your alarm experience to your preferences for a more convenient wake-up routine.

Radio Features
Explore the radio capabilities of your Timex Clock Radio, featuring AM/FM tuning, preset station storage, and adjustable volume for a seamless listening experience.
Tuning into FM Stations
To tune into FM stations on your Timex Clock Radio, press the AM/FM button to select FM mode. Use the tuner knob to find your desired station. For automatic tuning, press and hold the tuner knob until the radio scans and stops at the next available station. For manual tuning, simply turn the knob to adjust the frequency. You can also save up to 10 preset stations for quick access. Adjust the volume as needed for optimal sound quality.
Automatic and Manual Tuning
For automatic tuning, press and hold the tuner knob to scan FM stations. The radio stops at strong signals. Manual tuning allows precise adjustments by turning the knob. Use automatic for quick station finding or manual for finer control. Ensure stable signal reception for clear sound quality. This feature ensures easy access to your favorite FM stations with minimal effort.
Saving Preset Stations
Your Timex Radio Clock allows saving up to 10 FM preset stations for quick access. To save, tune to the desired station, press and hold the preset button until it beeps, then release. Assign numbers 1-10 to your favorite stations. This feature enhances convenience, letting you enjoy seamless radio listening without manual tuning each time. Ensure stations are strong for clear sound quality and easy recall.

Display Settings
Adjust the LCD brightness for optimal visibility and understand the display icons to monitor battery status, alarm activation, and radio mode. Customize your viewing experience effortlessly.
Adjusting LCD Brightness
To optimize visibility, adjust the LCD brightness using the designated buttons. Press the “+” button to increase brightness and “-” to decrease it. Find the perfect level for your environment. The LCD display also features an automatic adjustment option for ease of use. Ensure the screen is clear and readable, whether in bright daylight or at night, enhancing your overall user experience with the Timex Radio Clock.
Understanding Display Icons
The Timex Radio Clock features several display icons to guide you. The battery icon indicates battery backup status. The alarm bell shows active alarms, while a bell with a line means alarms are off. The signal bars display radio reception strength. Familiarize yourself with these icons to monitor your settings and connectivity easily. This visual system ensures intuitive operation and quick access to essential information at a glance.

Power Management
Your Timex Radio Clock efficiently manages power with a battery backup system, ensuring uninterrupted timekeeping during outages. It also features power-saving modes to optimize energy use.
Battery Backup System
The Timex Radio Clock features a reliable battery backup system, ensuring uninterrupted timekeeping and alarm functionality during power outages. This system activates automatically when the main power source is lost, preserving your settings. The backup battery maintains the clock’s essential functions, though it does not power the radio; This feature provides peace of mind, knowing your alarms and time remain accurate even during temporary power interruptions. Proper installation of the backup battery is crucial for optimal performance.
Power-Saving Modes
The Timex Radio Clock offers power-saving modes to reduce energy consumption. These modes automatically deactivate non-essential features, such as the display backlight or radio, when the device is inactive. Activating power-saving modes helps extend battery life and lower overall power usage. The clock retains essential functions like timekeeping and alarms, ensuring reliability while conserving energy. This feature is ideal for prolonging battery life and minimizing operational costs. Enable power-saving modes through the device settings for optimal efficiency.
Low Battery Indication
The Timex Radio Clock features a low battery indication to alert you when the battery level is critically low. A visual or audible alert will notify you to replace or recharge the batteries promptly. This ensures uninterrupted operation of essential functions like timekeeping and alarms. Replace the batteries as soon as the low battery indicator appears to avoid data loss or temporary shutdown. This feature is designed to maximize reliability and user convenience.

Troubleshooting
Identify common issues and resolve them with practical solutions. Resetting the device, addressing poor radio reception, and battery-related problems are covered here for optimal functionality.
Common Issues and Solutions
Address common issues like weak GPS signals by moving to open areas or resetting the clock radio. For poor radio reception, adjust the FM antenna or reposition the device. If the display is dim, check battery levels or adjust brightness settings. Resetting the clock resolves synchronization issues. Ensure proper battery installation for backup systems. Refer to troubleshooting steps for detailed solutions to maintain optimal functionality and performance.
Resetting the Clock Radio
To reset your Timex Clock Radio, insert a paper clip into the small reset hole on the back, hold for 3 seconds, then release. This restores default settings and clears alarms. After resetting, the clock radio will restart, requiring you to reconfigure time, alarms, and preferences. Note that resetting does not affect the battery backup system, which maintains time and alarm settings during power outages.
Addressing Poor Radio Reception
If experiencing poor radio reception, ensure the FM antenna is fully extended and adjust its position for better signal. Move the clock to an open area away from obstructions. Check that the station is tuned correctly and switch to a stronger signal if needed. Avoid placing the clock near devices emitting electromagnetic interference. For persistent issues, consider using an external antenna or relocating the clock. Regularly re-tune stations for optimal performance.
Maintenance and Care
Regularly clean your Timex clock with a soft cloth. Store it in a dry, cool place. Avoid exposing it to water or extreme temperatures for optimal performance.
Cleaning the Device
To maintain your Timex radio clock, gently wipe the exterior with a soft, dry cloth. Avoid using liquids or harsh chemicals, as they may damage the finish or harm internal components. For stubborn marks, lightly dampen the cloth with water, but ensure the device is dry afterward. Regular cleaning prevents dust buildup and ensures optimal performance. Never submerge the clock in water or expose it to excessive moisture during cleaning.
Storage Recommendations
Store your Timex radio clock in a cool, dry place away from direct sunlight and moisture. Use the original packaging or a protective cover to prevent scratches. Avoid extreme temperatures or humidity, as this may affect performance. If storing for an extended period, remove batteries to prevent leakage. Keep the device upright to protect the LCD screen. Proper storage ensures longevity and maintains functionality when you resume use.
Warranty Information
Your Timex Radio Clock is backed by a limited warranty covering manufacturing defects. Register your product to validate the warranty and access exclusive support services.
Understanding Your Warranty
Your Timex Radio Clock is protected by a limited warranty that covers manufacturing defects for a specified period. The warranty ensures repair or replacement of defective parts. Registration is required to validate the warranty and access support services. The warranty does not cover damage caused by misuse, tampering, or external factors. Refer to the warranty terms for detailed coverage and exclusions to ensure proper protection of your device.
Registering Your Product
Registering your Timex Radio Clock ensures warranty validation and access to dedicated support services. Visit the Timex official website and provide your product details, including the serial number, to complete the registration process. This step is essential for maintaining warranty coverage and receiving timely assistance. For more information, refer to the warranty section or contact Timex customer support through their official website.
Congratulations on completing the Timex Radio Clock Manual. This guide has provided comprehensive instructions to help you maximize your device’s features and functionality effectively.
Final Tips for Optimal Use
Regularly update your Timex Radio Clock to ensure the latest features and performance. Clean the device with a soft cloth and avoid harsh chemicals. Store the clock in a cool, dry place when not in use. Always maintain the battery backup system to prevent time loss during power outages. Explore all functions, like the snooze feature and preset radio stations, to enhance your experience. For optimal reception, position the antenna correctly and keep it away from metal objects. Refer to the manual for troubleshooting common issues and resetting the clock if needed. By following these tips, you’ll enjoy reliable performance and longevity from your Timex Radio Clock.
Staying Updated with Timex
Visit the Timex website regularly for the latest updates, manuals, and guides to ensure your radio clock stays optimized. Register your product to receive notifications about new features or software enhancements. Download the latest user manuals for detailed instructions and troubleshooting tips. Stay informed about new Timex products and innovations to enhance your experience. Regular updates and maintenance will keep your clock radio performing at its best.